Hi everyone! Are you enjoying the summer? For me, I started a new job in July that is a lot more hours, so I do not have much time or energy to craft as I like. And next week, I am going on a two week camping vacation (which means no craft room…). With so little time for crafting, it’s important to maximize what time I have. Today’s cards are like the 2-from-1 background cards, but with the use of scrap paper. This is definitely a time-saving technique!
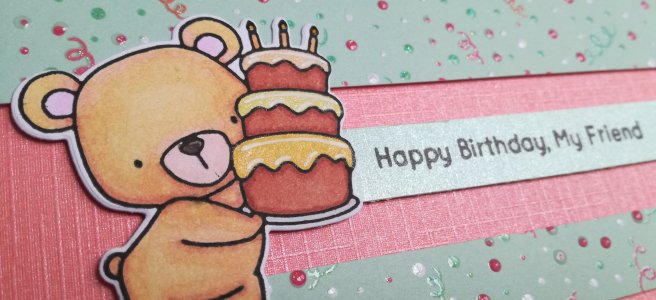
Birthday cards are always handy to have around, so without anyone in particular in mind, I made the following card:
There are a lot of small details that one just can’t really see in the photos unless I point it out, but that’s what this blog post is for! This was a very simple card and easy card to make and was following a card challenge sketch. Continue reading “Pink and green bear-thday!”→
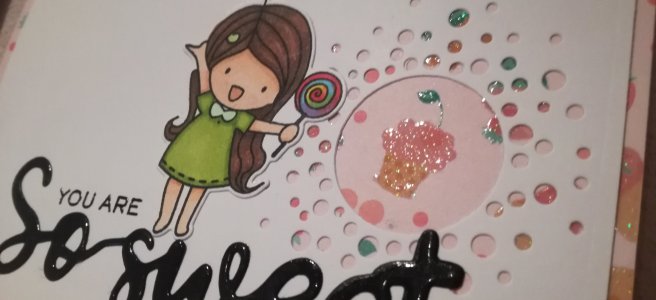
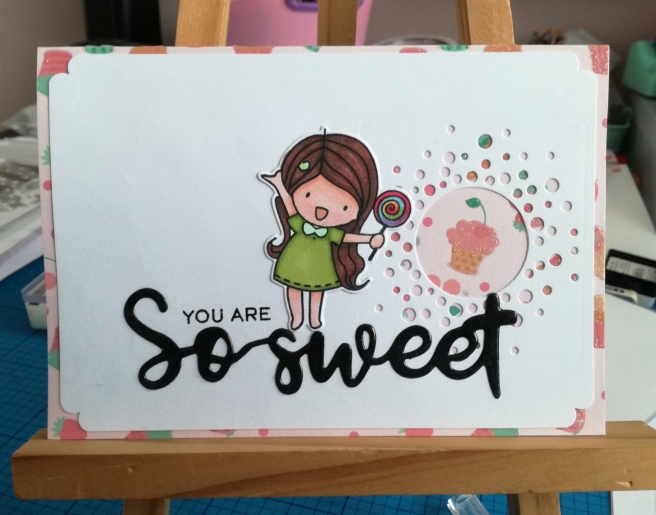
I got a new die (the circles) and I wanted to use it, so I created this sweet little card!
It’s a clean and simple card so it was rather easy to put together. I had made the little girl image a few days earlier, and she’s just so sweet and cute that she had to be used on a card soon! I also really love this patterned card paper of the cupcakes and strawberries, and I thought it was also perfect to use the circle die to showcase one of the cupcakes. It was not easy to choose which cupcake to use! Continue reading “So Sweet!”→
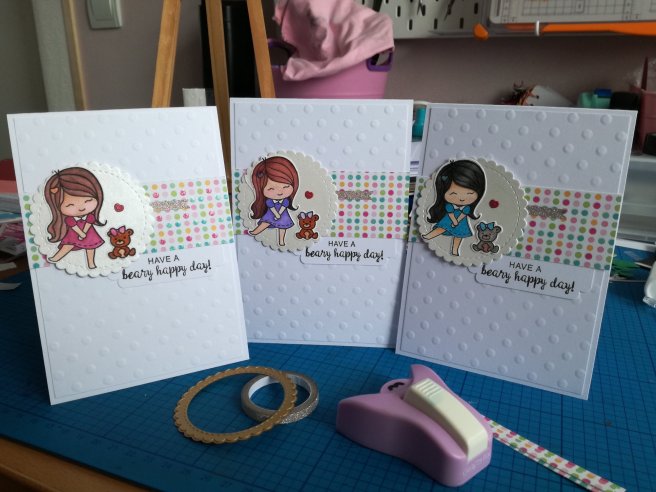
Often I spend a lot of time making one card, but making three cards at once does not take that much more time… although the whole process took several days since I rarely have the chance to sit for a very long time to do something. Continue reading “Beary Happy Day!”→
I wanted to do a challenge and when I was looking at the sketch, I noticed the grey rectangle was “hanging off” the side of the card. This inspired me to do a tri-fold card!
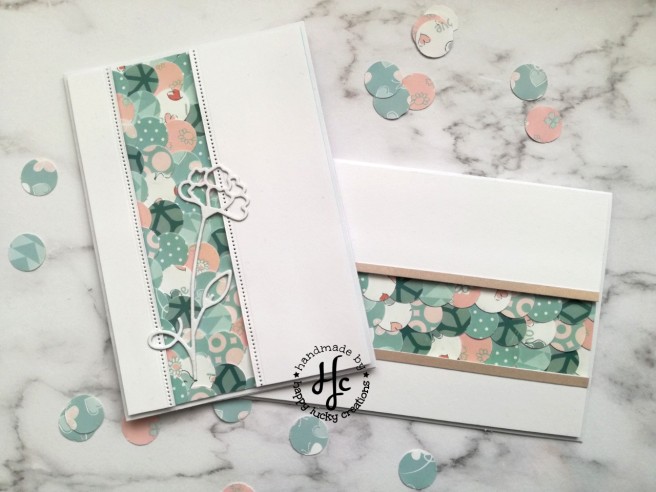
I created another challenge card. For my second challenge, I chose ModSquadChallenge’s Black and White and One Other color. The challenge is tos to make a black and white card with one other colour. As I was trying to come up with ideas, I looked through my dies and found this wreath die I never used before. Then I had a vision of this card and I told myself, “Just do it!” And here is the card:
The photo does not do it justice… it is really stunning in person!
This card is not difficult to make, just a little time consuming. I started by cutting a black piece of card stock to size and then die cut the wreath. Then I die cut the wreath again, but on white card stock. I was using the die-cut inlay technique. After both pieces were die cutted, I took a fat roll of double-sided tape and put it on the back of the card where the hole for the wreath was. I turned the card over to expose the sticky tape where the hole is and proceeded to place the white die cut wreath in and the black center piece.
Once that was done, I then die cut and punched out some leaves with the same white card stock. Then I took two 5-petal flower punches and and punched pink flowers out of pink origami paper. I like using origami paper to make flowers with because it’s so fine, delicate, and soft, like flowers. For each flower, I took a ball-tipped tool and rolled the ball over each petal and flower center to give it that concaveness, so they are not flat boring flowers. I then set this all aside and started on the word “love”.
To make the word “love”, I used a die cut for the word on white card stock and then covered it with Versamark Dazzle. Then I coated it with clear embossing powder. I did this three times to give it this smooth glittery enamel-like finish. It was so beautiful that I had to take a close-up picture of it.
Once the word was done, I glued it into the center of the wreath and then proceeded to build the wreath with more white leaves to give it dimension as well as gluing flowers here and there. When that was all done, I stuck self-adhesive gems in the center of each flower.
Finally, I felt the card was a bit bland on the bottom, but I didn’t want to add too much to it, so I just made two score lines for a subtle effect. It was a bit difficult to score the card with the flowers (I was afraid they would get flattened or smooshed), but the flowers survived. I am curious how this card will fare going through the post, so I think I might mail it to myself and see what happens!
Anyway, I hope you enjoyed this card and perhaps learned something or got inspired to create happiness today!
This card is very easy to make, but requires a lot of patience! The amount of candles can easily be changed to any amount you would like to make. Learn my quick trick in making all the little candle flames! Plus, find out what kind of foil I use (my tip to save money!)
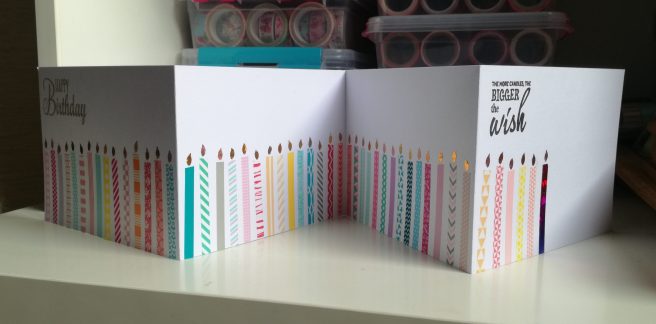
First I started with two folded white cardstock and delved into my washi tape collection. Since the person I was making the card for was turning 49, I picked out 48 different washi tapes. I planned to make the 49th candle a special holographic rainbow foil candle.
The completed card. You can also see a portion of my washi tape collection….
After I got my tapes, I proceeded to do some simple calculations and measurements to see how many candles need to be on each card face, then I proceeded to put the tape onto the card in a “random” fashion. They were not evenly spaced, nor all standing straight. They were also all different heights. This variation gives the card a more natural feel.
Once I placed all the washi tape on, I used a thin piece of double sided tape and placed it down as the last candle. I then removed the tape’s paper and placed my holographic foil on top, rubbed, and peeled it off. Tada, a foiled candle! (See the last candle.)
Nail foils for making cards?! Yes it can!
The kind of foils I used are actually nail foils!! It’s very inexpensive and and I get lots of different colours and designs. I found that the nail foils also work very similar, if not the same, as craft transfer foil sheets. For more information on the nail foils, here is my blog post about it: Foils galore!
Flower punch for candle flames
Anyway, to make the candle flames, the trick is to use this particular flower punch (see picture). Notice how each petal looks like a little candle flame? So I punched out a few of these flowers from double-sided adhesive sheets, took a craft knife to cut off each petal from the center, and tada! Six little candle flames per flower! Then you simply stick on each little petal/flame above each candle, remove the top paper to expose the adhesive and you are ready to foil away!
Once that was done, I stamped my sentiments, one that says “Happy Birthday” in a garden green colour, and the other that says “The more candles the BIGGER the wish” with Versafine Onyx Black. Then I went over the “Happy Birthday” sentiment with a Sakura Clear Startdust Gelly Roll. Finally, I assembled the two cards together by placing double sided tape and a piece of plain white typing paper on the back of the card join, and the card was complete!
Here is a list of some of the materials used:
Stamp: “Happy Birthday” from “Just to Say” stamp set by Viva
Punch: 6-petal flower by Picture Perfect
Pen: Clear Startdust Gelly Roll by Sakura
Stamp Ink: Versafine Onyx Black by Tsukineko
Stamp Ink: Garden Green by Close to my Heart
Washi Tapes: 6mm width, mostly bought from Action (a discount store in some parts of EU)
Foil: colours used are holographic cracked glass rainbow for the candle, rose champagne gold holographic and sparkle gold for the flames
White cardstock, about 220gsm.
Small plain white typing paper
What I love about this card is the simple yet chic look. It’s also colourful and the foil on the flames makes a subtle but strong impact. There’s also enough space to write a message.
Anyway, I hope you enjoyed this very first post. Create happiness today!